
Centerpieces on the tables are a nice touch that can really make your decorating stand out. There is no need to buy one already put together, because there are plenty of ways you can put together a cheap centerpiece yourself that will look great. Floating candles shaped like flower blossoms in glass bowls can look great, just add some glass rocks to the bottom of the bowl in a color that matches your theme. You could also just use a simple bouquet of flowers as a centerpiece in colors that match your theme. Or, place several pillar candles on a pretty plate and fill the gaps in the plate with small clear Christmas ornaments with the hooks removed. The idea is that the clear ornaments will look like bubbles. You can vary this idea by using champagne bottles in place of the candles, or you can mix the two up.
Showing posts with label Seasonal. Show all posts
Showing posts with label Seasonal. Show all posts
Wednesday, December 31, 2008
Decorating for a New Year's Eve Party – Part Two
There are plenty of banners available at party stores that you could hang near the entry way of your home or even outside the front door. You can make a banner too, if you are the artistic type. A metallic banner can match a more sophisticated theme. If you are having a party where there will be lots of kids, consider having them make the banner as well as the noise makers. All they will need to make a fun banner is a large piece of construction paper, stencils, and markers.
Centerpieces on the tables are a nice touch that can really make your decorating stand out. There is no need to buy one already put together, because there are plenty of ways you can put together a cheap centerpiece yourself that will look great. Floating candles shaped like flower blossoms in glass bowls can look great, just add some glass rocks to the bottom of the bowl in a color that matches your theme. You could also just use a simple bouquet of flowers as a centerpiece in colors that match your theme. Or, place several pillar candles on a pretty plate and fill the gaps in the plate with small clear Christmas ornaments with the hooks removed. The idea is that the clear ornaments will look like bubbles. You can vary this idea by using champagne bottles in place of the candles, or you can mix the two up.
Centerpieces on the tables are a nice touch that can really make your decorating stand out. There is no need to buy one already put together, because there are plenty of ways you can put together a cheap centerpiece yourself that will look great. Floating candles shaped like flower blossoms in glass bowls can look great, just add some glass rocks to the bottom of the bowl in a color that matches your theme. You could also just use a simple bouquet of flowers as a centerpiece in colors that match your theme. Or, place several pillar candles on a pretty plate and fill the gaps in the plate with small clear Christmas ornaments with the hooks removed. The idea is that the clear ornaments will look like bubbles. You can vary this idea by using champagne bottles in place of the candles, or you can mix the two up.


Tuesday, December 30, 2008
Decorating for a New Year's Eve Party – Part One
Hosting a New Year's Eve party often includes decorating for the night. Decorating doesn't have to be a huge deal, there are several ways you can decorate easily and quickly without having to spend too much money.
First you should pick a theme to go with. Many New Year's Eve parties are adults only, in which case you may want to choose a different theme than if the party is going to be a neighborhood party including children. Fun hats and noisemakers are pretty much a must for either type of party, since kids and adults both get a kick out of these items.
First you should pick a theme to go with. Many New Year's Eve parties are adults only, in which case you may want to choose a different theme than if the party is going to be a neighborhood party including children. Fun hats and noisemakers are pretty much a must for either type of party, since kids and adults both get a kick out of these items.

However, especially if you are going to have a lot of kids at your party, you might not want to hand out the noise makers until a few minutes before midnight unless you don't mind all of the racket kids will make with them. Another option if there are going to be lots of children at your party is to recruit them to make the noisemakers as a craft. Have them fill coffee cans with uncooked rice or change. Then they can cover the coffee cans with construction paper with designs drawn on. Hats you should hand out right away. Masks can add a sophisticated air to your party.
Balloons are a cheap way to add some color to your decorating. You can always find balloons in colors that will match your theme. Silver balloons will look classier, colorful balloons will look good for a neighborhood party.
Check back tomorrow for part two of this blog.
This blog is brought to you by rehab jobs.
Balloons are a cheap way to add some color to your decorating. You can always find balloons in colors that will match your theme. Silver balloons will look classier, colorful balloons will look good for a neighborhood party.
Check back tomorrow for part two of this blog.
This blog is brought to you by rehab jobs.
Wednesday, December 24, 2008
Last Minute Christmas Decorations – Part Two
Greeting cards are something that you already have on hand that can easily be used for decorating. You can even use cards from past holiday seasons if you don’t have enough for decorating from this season. Display them on your mantle among sprigs of greenery. Use a hole punch in the corner of each card and string them along a wall.
Gifts that are already wrapped make great decorations. Spend a little extra time wrapping your gifts nicely, and you can use them for decorating also. Make sure to use bows and ribbon if you want to go the extra mile. Place some gifts under the tree as usual, but display others around the house in different places too.

Stack a couple of gifts on an end table, or place a few along your mantle. Place a stack of gifts near your entry way or place a few above your kitchen cabinets.
If you like the idea of decorating with gifts, but don’t have enough around, you can always wrap a few empty boxes. If you want to diversify the theme a little more, you can wrap ribbon around your throw pillows and place a bow in the center to make your pillows look like gifts.
Place a few candy canes in a simple clear glass cup or a small vase. Tie small red ribbons around the necks of the candy canes and display them on your mantle or end table.
This blog is brought to you by occupational therapy jobs.
Gifts that are already wrapped make great decorations. Spend a little extra time wrapping your gifts nicely, and you can use them for decorating also. Make sure to use bows and ribbon if you want to go the extra mile. Place some gifts under the tree as usual, but display others around the house in different places too.

Stack a couple of gifts on an end table, or place a few along your mantle. Place a stack of gifts near your entry way or place a few above your kitchen cabinets.
If you like the idea of decorating with gifts, but don’t have enough around, you can always wrap a few empty boxes. If you want to diversify the theme a little more, you can wrap ribbon around your throw pillows and place a bow in the center to make your pillows look like gifts.
Place a few candy canes in a simple clear glass cup or a small vase. Tie small red ribbons around the necks of the candy canes and display them on your mantle or end table.
This blog is brought to you by occupational therapy jobs.
Tuesday, December 23, 2008
Last Minute Christmas Decorations – Part One
There isn’t very much time to finish decorating for Christmas. If you are hosting a Christmas get together at your house, you may want to do some speedy and cheap decorating. Never fear, there are several things you could do very quickly.
For Christmas dinner if you don’t have any Christmas plates or settings, you can use plain white plates. Use a red or white tablecloth, or use red or white place mats. Then, place one round glass ornament on each plate. This looks classier if you use just one color for all of the ornaments, and it looks more fun and happy if you use several colors. You can even use a variety of ornament types for a more sentimental look. If you want to get more elaborate, you can use small ornaments along with the large ornaments and even add seasonal greenery or colored tinsel.
If you want a more fancy centerpiece for your kitchen table, try placing cream or white colored pillar candles and tapered candles in a ceramic or metal bowl. Fill the spaces between them in the bottom half of the bowl with newspaper. On top of the newspaper place shiny ornaments in the bowl until it is overflowing with them. Silver ornaments and beads look really nice. Then, right when your guests sit down to dinner you can light the candles. Just make sure to blow them out when you’re done, since this display of candles might not be totally steady.
Check back soon for part two of this blog.
This blog is brought to you by nephrology jobs.
For Christmas dinner if you don’t have any Christmas plates or settings, you can use plain white plates. Use a red or white tablecloth, or use red or white place mats. Then, place one round glass ornament on each plate. This looks classier if you use just one color for all of the ornaments, and it looks more fun and happy if you use several colors. You can even use a variety of ornament types for a more sentimental look. If you want to get more elaborate, you can use small ornaments along with the large ornaments and even add seasonal greenery or colored tinsel.

Next, place a glass or silver pedestal cake stand in the center of the table and fill it with ornaments that match the ornaments you have on the plates.
If you want a more fancy centerpiece for your kitchen table, try placing cream or white colored pillar candles and tapered candles in a ceramic or metal bowl. Fill the spaces between them in the bottom half of the bowl with newspaper. On top of the newspaper place shiny ornaments in the bowl until it is overflowing with them. Silver ornaments and beads look really nice. Then, right when your guests sit down to dinner you can light the candles. Just make sure to blow them out when you’re done, since this display of candles might not be totally steady.
Check back soon for part two of this blog.
This blog is brought to you by nephrology jobs.
Tuesday, December 16, 2008
Decorate for the Holidays Inexpensively - Part Two
Tea light candles are extremely cheap. You can find them at dollar stores easily most of the time. Use tea light candles in clean glass jars. The jars can even be recycled jars that your food items came in, such as applesauce jars or mayonnaise jars. Tie a red, silver, green, or sparkly ribbon around the neck of the jar. Group a few of these candles together on end tables or a mantle for an easy, pretty decoration.
Try looking at thrift stores or discount stores for teddy bears or other holiday animals. Put them through the wash, and most of them will look brand new. When they're dry, tie colorful ribbons around their necks. Next, collect various sizes of boxes from shoebox size down. Wrap them in colorful wrapping paper and tie pretty bows around them. Display these present boxes with the teddy bears for an adorable decorating scheme. Try gluing a box under a bear's arm, or have a bear sitting on a present.

Hang a few ornaments or a few strands of tinsel from a chandelier. You can add a few pieces of greenery too, tied on with ribbon.
Use acrylic paint and some seasonally shaped sponges that you can find in a craft store to decorate your windows. Colors like white, red, green, gold, or silver look very festive. This can be a fun project that kids might like to participate in too.
Christmas tree ornaments can be used in places other than just your tree. Try picking out several ornaments that are the same color and putting them in a small decorative bowl on your mantle or on an end table.
This blog is brought to you by physical therapy jobs.
Try looking at thrift stores or discount stores for teddy bears or other holiday animals. Put them through the wash, and most of them will look brand new. When they're dry, tie colorful ribbons around their necks. Next, collect various sizes of boxes from shoebox size down. Wrap them in colorful wrapping paper and tie pretty bows around them. Display these present boxes with the teddy bears for an adorable decorating scheme. Try gluing a box under a bear's arm, or have a bear sitting on a present.

Hang a few ornaments or a few strands of tinsel from a chandelier. You can add a few pieces of greenery too, tied on with ribbon.
Use acrylic paint and some seasonally shaped sponges that you can find in a craft store to decorate your windows. Colors like white, red, green, gold, or silver look very festive. This can be a fun project that kids might like to participate in too.
Christmas tree ornaments can be used in places other than just your tree. Try picking out several ornaments that are the same color and putting them in a small decorative bowl on your mantle or on an end table.
This blog is brought to you by physical therapy jobs.
Monday, December 15, 2008
Decorate for the Holidays Inexpensively - Part One
Many people do not have a lot in their budget for holiday decorating this year. But, you would be surprised how many nice decorations you can create very inexpensively. You may not end up needing to buy any full priced decorations.
Before you buy any decorations or any materials for the following ideas, or spend any time making any of these decorations, take the time to plan out your decorating theme. This can save you time and money that you might spend experimenting, so it makes sense to plan. Some people like to decorate with a more classy looking theme, consisting of a lot of white, clear, silver and shimmery decorations. Some people may find this boring and opt to decorate using more vibrant colors in a toy land theme for example. Some people like to go with a more subtle cabin or ski lodge decoration scheme that will look warm and cozy.
Use what you can for free from your back yard. Trim small branches from pine trees and gather pine cones and holly. These can all be used to make a centerpiece, or to decorate a mantle. Pine cones can be spray painted with gold, silver, or sparkley paint.
Pine tree branches can be used as an accent to almost any decoration, and they smell nice too, so be liberal when you are gathering them. If you have bird houses in your back yard that are going to waste during the cold months, bring them inside. Wash them off, and tie ribbons around them. Add a couple small pine branches, and you have a beautiful hanging decoration.
Check back soon for part two of this blog.
This blog is brought to you by physician staffing.
Before you buy any decorations or any materials for the following ideas, or spend any time making any of these decorations, take the time to plan out your decorating theme. This can save you time and money that you might spend experimenting, so it makes sense to plan. Some people like to decorate with a more classy looking theme, consisting of a lot of white, clear, silver and shimmery decorations. Some people may find this boring and opt to decorate using more vibrant colors in a toy land theme for example. Some people like to go with a more subtle cabin or ski lodge decoration scheme that will look warm and cozy.
Use what you can for free from your back yard. Trim small branches from pine trees and gather pine cones and holly. These can all be used to make a centerpiece, or to decorate a mantle. Pine cones can be spray painted with gold, silver, or sparkley paint.

Pine tree branches can be used as an accent to almost any decoration, and they smell nice too, so be liberal when you are gathering them. If you have bird houses in your back yard that are going to waste during the cold months, bring them inside. Wash them off, and tie ribbons around them. Add a couple small pine branches, and you have a beautiful hanging decoration.
Check back soon for part two of this blog.
This blog is brought to you by physician staffing.
Tuesday, December 9, 2008
Clothes Pin Ornaments
Old fashioned wooden clothes pins can make quite cute Santa ornaments. Make sure to get the kind pictured below, the kind with the hinges might work, but not quite as well. You’ll need red and white felt, red pipe cleaners, red, black, yellow, and peach paint, acrylic is probably the cheapest and easiest, and glue.

The clothes pins have what looks like legs already, and small torsos, so without even getting started you can imagine how the Santa will look. First glue a one to two inch piece of clothes hanger on each side of the clothes pin. If you have a drill, you can simply drill through the clothes pin and string one longer piece of pipe cleaner through for his arms.
Next, paint everything but the top part, which will be the head, red. After the paint has dried use black paint to paint the bottom sections of his legs black, like boots. Use the black paint to draw a line where his coat would be covering his pants. Draw a black belt around his waist, and draw on two small dots for his eyes. Use the yellow paint to draw a square buckle on his belt. Use the peach to make his cheeks look rosy.
Cut a small rectangle of red felt and roll it into a cone to be used as the Santa hat, then glue it in place. Glue on a bit of white felt for his beard, and use a little more white felt for trim on santa’s hat.
Using a bit of red thread and a needle, sew a loop onto the Santa hat. This will be your ornament hanger.
This blog is brought to you by dialysis nursing jobs.

The clothes pins have what looks like legs already, and small torsos, so without even getting started you can imagine how the Santa will look. First glue a one to two inch piece of clothes hanger on each side of the clothes pin. If you have a drill, you can simply drill through the clothes pin and string one longer piece of pipe cleaner through for his arms.
Next, paint everything but the top part, which will be the head, red. After the paint has dried use black paint to paint the bottom sections of his legs black, like boots. Use the black paint to draw a line where his coat would be covering his pants. Draw a black belt around his waist, and draw on two small dots for his eyes. Use the yellow paint to draw a square buckle on his belt. Use the peach to make his cheeks look rosy.
Cut a small rectangle of red felt and roll it into a cone to be used as the Santa hat, then glue it in place. Glue on a bit of white felt for his beard, and use a little more white felt for trim on santa’s hat.
Using a bit of red thread and a needle, sew a loop onto the Santa hat. This will be your ornament hanger.
This blog is brought to you by dialysis nursing jobs.
Monday, December 8, 2008
Make your own picture frame ornament
There are many types of Christmas tree ornaments that you can make fairly easily and you won’t have to spend a lot of money on materials. These can be fun if you are the crafty type, and they are especially fun for kids to make. Some are as simple as baking cookies and hanging them from ribbons, but others need a bit more explanation.

Use a juice can lid to make a pretty picture frame ornament. Cut a round picture out to use in your ornament. You can choose a picture of a family member or a picture of something that makes you feel the holiday cheer, like an angel, santa, or reindeer. Glue the picture to the top of the lid. Now, you’ll need a piece of decorative cording to glue around the edge of your picture. Glue a piece of ribbon that is six to ten inches long or so to the back of the can. Glue the ribbon so it has a few inches on each side of the place where you glued it. Tie the ends together in a bow, this is how you’ll hang the ornament. Next, glue a piece of lace around the edge of the lid on the back. Your ornament should be ready to hang as soon as the glue dries.
You can be a little creative with these instructions if you prefer, instead of using cording around the picture, maybe you’d rather use a thin ribbon. Or, Use a wide sheer ribbon around the ornament instead of lace. Have fun!
Check back soon for directions on how to make a poinsettia ornament.
This blog is brought to you by physician staffing.

Use a juice can lid to make a pretty picture frame ornament. Cut a round picture out to use in your ornament. You can choose a picture of a family member or a picture of something that makes you feel the holiday cheer, like an angel, santa, or reindeer. Glue the picture to the top of the lid. Now, you’ll need a piece of decorative cording to glue around the edge of your picture. Glue a piece of ribbon that is six to ten inches long or so to the back of the can. Glue the ribbon so it has a few inches on each side of the place where you glued it. Tie the ends together in a bow, this is how you’ll hang the ornament. Next, glue a piece of lace around the edge of the lid on the back. Your ornament should be ready to hang as soon as the glue dries.
You can be a little creative with these instructions if you prefer, instead of using cording around the picture, maybe you’d rather use a thin ribbon. Or, Use a wide sheer ribbon around the ornament instead of lace. Have fun!
Check back soon for directions on how to make a poinsettia ornament.
This blog is brought to you by physician staffing.
Friday, December 5, 2008
Make your own poinsettia ornament
A lovely poinsettia ornament is easy to make, and what captures the holiday spirit better than a poinsettia? 

You’ll need to cut a circle out of cardboard to start with. Your circle can be as big as you want the ornament to be, usually 3-4 inches across. Use the mouth of a large cup to trace around the cardboard for your cutout. Now, you’ll need a small amount of red, green and white felt. Cut two pieces of green felt out that are slightly bigger than your piece of cardboard. You’ll want to make sure that about a fourth of an inch of green felt is overhanging the cardboard cutout on all sides. Glue one circle of green felt to each side of the cardboard. Now, using a needle and some thick red thread or thin red string, sew the sides of the felt together using stitches that are about an eighth of an inch apart. When you’re done, use the thick red thread to sew a large loop of thread through for your ornament hanger, tie it together. Next, you will need to cut out diamond shapes from the red felt. Each diamond shape should be a little less wide than half of your ornament so far. Arrange the diamonds like petals of the poinsettia, gluing each one on. You’ll want them layered to look more real. The top layer looks best if it is just four diamonds. Where the diamonds come together, glue three small circles of white felt, each only about 3/8 of an inch in diameter.
This blog is brought to you by occupational therapy jobs.
This blog is brought to you by occupational therapy jobs.
Thursday, December 4, 2008
Christmas Decoration Crafts - Part Four
Put the mixture you created (see previous blog) into a paper bag along with the orange and roll the orange around inside until it is totally coated in the spices. Leave the orange in the bag in a cool dry place for about a month. Each day roll the orange in the spices again.
The orange may finish curing in as few as three weeks if you live in a very dry climate, and if you live somewhere more humid it may take up to six months. You’ll know your pomander is done when you tap it and hear a hollow sound and the orange feels light in weight. When the pomander reaches this point you’ll want to shake off any extra spices before displaying it in your home.
I find that because you need to remember to roll the orange in the mixture at least every few days for a month or more, it makes sense to make more than one of these at a time, especially since they last for years. You could even make a whole batch and give them away as holiday gifts.
Pomanders look good displayed in pairs in a decorative bowl or on a decorative plate on a bed of cloves or potpourri. If you feel like getting creative, insert the cloves into your pomander in a pattern or add ribbon to your finished product.

If your pomander starts to lose its scent you can simply mix up a batch of spice mixture and re roll the orange in the mixture.
Check back soon for the next part of this blog.
This blog is brought to you by dialysis nursing.
The orange may finish curing in as few as three weeks if you live in a very dry climate, and if you live somewhere more humid it may take up to six months. You’ll know your pomander is done when you tap it and hear a hollow sound and the orange feels light in weight. When the pomander reaches this point you’ll want to shake off any extra spices before displaying it in your home.
I find that because you need to remember to roll the orange in the mixture at least every few days for a month or more, it makes sense to make more than one of these at a time, especially since they last for years. You could even make a whole batch and give them away as holiday gifts.
Pomanders look good displayed in pairs in a decorative bowl or on a decorative plate on a bed of cloves or potpourri. If you feel like getting creative, insert the cloves into your pomander in a pattern or add ribbon to your finished product.

If your pomander starts to lose its scent you can simply mix up a batch of spice mixture and re roll the orange in the mixture.
Check back soon for the next part of this blog.
This blog is brought to you by dialysis nursing.
Tuesday, December 2, 2008
Christmas Decoration Crafts - Part Two
Wreaths are commonly used for Christmas decorations. They are usually quick to make, and there is a large variety of types to choose from, many more than I’ll list here.

I think the cutest one is a wreath made with dog bones. You can hang it over your dog’s bed inside and when the season is over, you can give most of it to your dog to eat. Start with a Styrofoam or cardboard shape. Secure a piece of ribbon to it, and then wind it around the circle on a slight diagonal, like stripes on a candy cane. Make sure the ribbon totally covers the cardboard or Styrofoam. Next, you’ll tie the dog bones onto the wreath using more ribbon. Get creative with the types of dog bones you use if you want a more colorful end product. Rubber dog bones come in bright colors, it looks cute to use red and green rubber dog bones. If you want to add more to this wreath tie evergreen sprigs around it also.
This next wreath is very elegant and pretty, it looks almost like light snow gathered into a wreath. You’ll need to form a wire clothes hanger into a circle using some wire cutters and needle nose pliers. Next, you’ll need to tie plastic sandwich bags around the wire using a simple knot. Tie them around until you’ve filled the circle. Add a shimmery bow around the finished wreath.
Check back soon for the next part of this blog.
This blog is brought to you by nephrology jobs.

I think the cutest one is a wreath made with dog bones. You can hang it over your dog’s bed inside and when the season is over, you can give most of it to your dog to eat. Start with a Styrofoam or cardboard shape. Secure a piece of ribbon to it, and then wind it around the circle on a slight diagonal, like stripes on a candy cane. Make sure the ribbon totally covers the cardboard or Styrofoam. Next, you’ll tie the dog bones onto the wreath using more ribbon. Get creative with the types of dog bones you use if you want a more colorful end product. Rubber dog bones come in bright colors, it looks cute to use red and green rubber dog bones. If you want to add more to this wreath tie evergreen sprigs around it also.
This next wreath is very elegant and pretty, it looks almost like light snow gathered into a wreath. You’ll need to form a wire clothes hanger into a circle using some wire cutters and needle nose pliers. Next, you’ll need to tie plastic sandwich bags around the wire using a simple knot. Tie them around until you’ve filled the circle. Add a shimmery bow around the finished wreath.
Check back soon for the next part of this blog.
This blog is brought to you by nephrology jobs.
Monday, December 1, 2008
Christmas Decoration Crafts - Part One
Now that Thanksgiving has passed it is time to take down your fall decorations and start putting up your Christmas decorations. I’m going to focus on decorations that you can make yourself for a cheap price.
One of the easiest and cheapest decorations is painting bricks to use as bookends or to display on tables throughout the home. This is a fun decoration for kids to do too. All you need are a few bricks, paint, and paintbrushes. Look online for inspiration and ideas of what to paint. Paint a snowman, Santa Clause, or a reindeer on the front of your brick.

Wrap your design around the sides of the brick too if they will be seen where you choose to display them. If you are not very good at painting, you could just paint alternating red and white stripes on a brick, or green with red polka dots, any pattern really. If you want to get more detailed, use some felt or other material to glue onto the brick as clothing for whatever character you painted. It is a good idea to glue felt on the bottom of the bricks so they don’t scratch up the furniture you choose to place them on. These cute bricks can be displayed anywhere by themselves, or in groups. They make wonderful door stops, table decorations, or mantle decorations.
Check back soon for the next part of this blog.
This blog is brought to you by physical therapy jobs.
One of the easiest and cheapest decorations is painting bricks to use as bookends or to display on tables throughout the home. This is a fun decoration for kids to do too. All you need are a few bricks, paint, and paintbrushes. Look online for inspiration and ideas of what to paint. Paint a snowman, Santa Clause, or a reindeer on the front of your brick.

Wrap your design around the sides of the brick too if they will be seen where you choose to display them. If you are not very good at painting, you could just paint alternating red and white stripes on a brick, or green with red polka dots, any pattern really. If you want to get more detailed, use some felt or other material to glue onto the brick as clothing for whatever character you painted. It is a good idea to glue felt on the bottom of the bricks so they don’t scratch up the furniture you choose to place them on. These cute bricks can be displayed anywhere by themselves, or in groups. They make wonderful door stops, table decorations, or mantle decorations.
Check back soon for the next part of this blog.
This blog is brought to you by physical therapy jobs.
Friday, November 14, 2008
Decorate with Ornaments
Christmas tree ornaments can be used creatively in a variety of ways for decorating, and the best part is the low cost.

Buy two medium or large clear ornaments and remove the metal part on top that attaches to a hook. Fill the ornaments at least half way with spices to use in hot chocolate or egg nog. One could be filled with ground nutmeg, and the other could be filled with ground cinnamon for example. Other options would be vanilla or chocolate powder, whatever you’d like really. Now, cover the openings with squares of cheesecloth. Secure the cheesecloth around the opening with silver or gold string.
Large clear ornaments can also be used to fill with bright candy, peppercorns, popcorn kernels or any other bright colored small food item. Tie bits of ribbon to the loops meant to use hooks in for hanging.
Use small sized festively colored ornaments for decorating the fridge. Tie two together using red ribbon, and hang them over a metal fridge clip that is clipped to a holiday photo or card.
Small ornaments also look cute used as decorations on cupcakes, one small ornament per cupcake.
You can make a cute centerpiece for a table using ornaments stuck on wooden skewers displayed in a vase. Use pieces of your Christmas tree in between ornaments.
Small ornaments can be tied in pairs around napkins with cute ribbon to create unique place settings for parties. Write the guests name who is to sit in each place on small pieces of paper and slip the pieces into clear ornaments, one for each pair in a setting.
This blog is brought to you by dialysis nursing jobs.

Buy two medium or large clear ornaments and remove the metal part on top that attaches to a hook. Fill the ornaments at least half way with spices to use in hot chocolate or egg nog. One could be filled with ground nutmeg, and the other could be filled with ground cinnamon for example. Other options would be vanilla or chocolate powder, whatever you’d like really. Now, cover the openings with squares of cheesecloth. Secure the cheesecloth around the opening with silver or gold string.
Large clear ornaments can also be used to fill with bright candy, peppercorns, popcorn kernels or any other bright colored small food item. Tie bits of ribbon to the loops meant to use hooks in for hanging.
Use small sized festively colored ornaments for decorating the fridge. Tie two together using red ribbon, and hang them over a metal fridge clip that is clipped to a holiday photo or card.
Small ornaments also look cute used as decorations on cupcakes, one small ornament per cupcake.
You can make a cute centerpiece for a table using ornaments stuck on wooden skewers displayed in a vase. Use pieces of your Christmas tree in between ornaments.
Small ornaments can be tied in pairs around napkins with cute ribbon to create unique place settings for parties. Write the guests name who is to sit in each place on small pieces of paper and slip the pieces into clear ornaments, one for each pair in a setting.
This blog is brought to you by dialysis nursing jobs.
Friday, October 24, 2008
Pumpkin Carving – Part Four
There are special pumpkin carving kits available at many stores. These kits are a lot easier to use for carving than knives that you happen to have around the kitchen, and a decent kit can usually be found for a good price. Kits usually include tiny serrated blades in several different sizes that make cutting intricate patterns easy. If you intend to really get into carving the details, having a drill on hand can make your task easier.

Candles look the most authentic inside carved pumpkins that are displayed, but the heat from the candles often causes pumpkins to shrivel and age prematurely. To prevent this, consider buying some lights meant to go inside of pumpkins. You can get lights that have tiny batteries in them so you don’t have to worry about finding an outlet. You can also get lights that flicker to look like a candle flame. These don’t usually cost more than a dollar per light, and they’re easier than candles too since you can leave them on instead of having to remember to light and blow out the candle each night.
There are a few unique things you can do with your pumpkin if you want it to stand out. You can put wax paper inside the pumpkin covering the design, this will create an opaque look when the pumpkin is lit. Tin foil inside the pumpkin across from the pattern makes the light emitted from the pumpkin look brighter.
Check back soon for part four of this blog.
This blog is brought to you by occupational therapy jobs.

Candles look the most authentic inside carved pumpkins that are displayed, but the heat from the candles often causes pumpkins to shrivel and age prematurely. To prevent this, consider buying some lights meant to go inside of pumpkins. You can get lights that have tiny batteries in them so you don’t have to worry about finding an outlet. You can also get lights that flicker to look like a candle flame. These don’t usually cost more than a dollar per light, and they’re easier than candles too since you can leave them on instead of having to remember to light and blow out the candle each night.
There are a few unique things you can do with your pumpkin if you want it to stand out. You can put wax paper inside the pumpkin covering the design, this will create an opaque look when the pumpkin is lit. Tin foil inside the pumpkin across from the pattern makes the light emitted from the pumpkin look brighter.
Check back soon for part four of this blog.
This blog is brought to you by occupational therapy jobs.
Thursday, October 23, 2008
Pumpkin Carving – Part Three
Drilling holes where you will need to start each cut will make carving easier. This way, the hard work is done, and you have a nice starting point for each cut. Make sure you make the most of your carving tools by sawing with them, this is how they are meant to be used. Pumpkin carving is time consuming; expect to spend awhile on this project if you want it to look good when you are done. Pay close attention to your pattern as you cut, you don’t want to end up losing track of the final goal and accidentally sawing off a vital connector area.

When the hard work of carving the pumpkin is done, you might want to spend a few minutes working to make it last as long as possible. Place the pumpkin in a tub full of cold water, let the pumpkin fill with water and sink. Let it soak for at least a couple of hours. Add a little bleach to the tub of water to help prevent molding. This process sounds strange, but it works to firm up the pumpkin. When you remove the pumpkin from the water, let it dry off and then rub Vaseline along any cut edges. This traps the water in the pumpkin, which is what you want, because when water escapes this is what causes pumpkins to shrivel.
Check back soon for part four of this blog.
This blog is brought to you by dialysis jobs.

When the hard work of carving the pumpkin is done, you might want to spend a few minutes working to make it last as long as possible. Place the pumpkin in a tub full of cold water, let the pumpkin fill with water and sink. Let it soak for at least a couple of hours. Add a little bleach to the tub of water to help prevent molding. This process sounds strange, but it works to firm up the pumpkin. When you remove the pumpkin from the water, let it dry off and then rub Vaseline along any cut edges. This traps the water in the pumpkin, which is what you want, because when water escapes this is what causes pumpkins to shrivel.
Check back soon for part four of this blog.
This blog is brought to you by dialysis jobs.
Wednesday, October 22, 2008
Pumpkin Carving – Part Two
Projection kits have gotten popular for pumpkins lately. To project the pattern from the pumpkin onto a wall you’ll want to carve a small pattern into the pumpkin. You also need to carve it backwards if there is any text involved, so it will project the correct direction when you are done.
Pumpkin carving can be as intricate of a process as you would like it to be depending on how complicated the pattern you select is. Many people carve a basic pattern, which will yield black where no pumpkin is carved away, and bright yellow where the carving has been done and the candle shows through. There are two other shades that can be achieved with careful carving though. The first is light orange, which will show through if you carve away all of the skin off of the front of the pumpkin and some of the meat, the more you carve, the lighter the orange will look. Dark orange will show through if you remove the pumpkin meat from the inside, leaving the skin alone on the front side.

Once you pick out a pattern that you like, you will need to transfer it to the pumpkin. First, tape or pin the pattern to the pumpkin. You can push a thumb tack through the paper along the patterns lines, you’ll need a lot of holes to see the pattern clearly. This is a lot of work, but it will be worth it when you are done and you don’t have to guess where to carve any of your lines.
Check back soon for part three of this blog.
This blog is brought to you by physical therapy jobs.
Pumpkin carving can be as intricate of a process as you would like it to be depending on how complicated the pattern you select is. Many people carve a basic pattern, which will yield black where no pumpkin is carved away, and bright yellow where the carving has been done and the candle shows through. There are two other shades that can be achieved with careful carving though. The first is light orange, which will show through if you carve away all of the skin off of the front of the pumpkin and some of the meat, the more you carve, the lighter the orange will look. Dark orange will show through if you remove the pumpkin meat from the inside, leaving the skin alone on the front side.

Once you pick out a pattern that you like, you will need to transfer it to the pumpkin. First, tape or pin the pattern to the pumpkin. You can push a thumb tack through the paper along the patterns lines, you’ll need a lot of holes to see the pattern clearly. This is a lot of work, but it will be worth it when you are done and you don’t have to guess where to carve any of your lines.
Check back soon for part three of this blog.
This blog is brought to you by physical therapy jobs.
Tuesday, October 21, 2008
Pumpkin Carving – Part One
If you haven’t carved a pumpkin yet for Halloween never fear, you still have plenty of time. Even if you don’t have kids, carving a pumpkin can be a lot of fun. There is an endless supply of pattern ideas available for free on the Internet, or get creative and create your own pumpkin design.

Choosing the perfect pumpkin is very important. There are lots of shapes available, you might want a tall oval shaped pumpkin if you envision carving the long faced Frankenstein, or you might want a short wide pumpkin if you want to carve a bat with wings outstretched. There is no perfect shape for all patterns, but you can find perfect shapes if you pick out your pattern first. A pumpkin with a sturdy stem is a sign of a health pumpkin and it will also make lifting the lid off of the carved pumpkin to insert candles a lot easier.
It may seem easy to prep the pumpkin for carving, but there are a few key things to do correctly during this process. Most importantly, when carving off the lid, make sure you carve at an angle in a cone shape. If you carve straight down your lid will just fall into your pumpkin, so this is crucial. The rest of the preparation is pretty simple, just remove the seeds and pulp and you’re ready to go.
Check back soon for part two of this blog.
This blog is brought to you by physician staffing.

Choosing the perfect pumpkin is very important. There are lots of shapes available, you might want a tall oval shaped pumpkin if you envision carving the long faced Frankenstein, or you might want a short wide pumpkin if you want to carve a bat with wings outstretched. There is no perfect shape for all patterns, but you can find perfect shapes if you pick out your pattern first. A pumpkin with a sturdy stem is a sign of a health pumpkin and it will also make lifting the lid off of the carved pumpkin to insert candles a lot easier.
It may seem easy to prep the pumpkin for carving, but there are a few key things to do correctly during this process. Most importantly, when carving off the lid, make sure you carve at an angle in a cone shape. If you carve straight down your lid will just fall into your pumpkin, so this is crucial. The rest of the preparation is pretty simple, just remove the seeds and pulp and you’re ready to go.
Check back soon for part two of this blog.
This blog is brought to you by physician staffing.
Monday, October 20, 2008
Decorate Your Home for a Halloween Party - Part Two
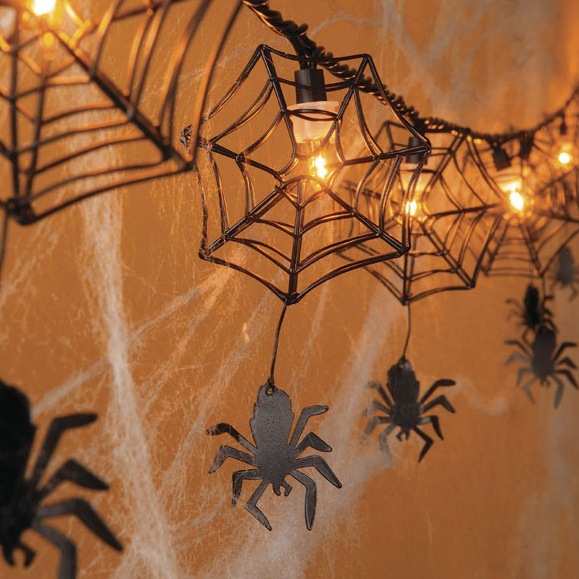
Fake spider webs are extremely cheap. You can use cotton batting if you prefer, artfully draped around your house. Make sure to buy a few fake spiders and bugs to add to your display.

Cut out a shape like a bat or a skull in black construction paper. Tape it onto a flashlight and shine the light towards a noticeable wall. This will cast a shadow in the shape of your cutout that will be a unique decoration.
Scary sound effects are easy to provide, as they are available on CD at many stores. If you place them in an entry way you might be able to surprise your guests.
Switch out some of your regular light bulbs with orange, yellow, or black bulbs for a dimmer spookier look.
A coffin can be built out of a wood frame and used for a variety of purposes. You could put a dummy inside with an arm hanging out. You could put cold drinks in coolers inside. Use your imagination here.
Scarecrows are a common fall decoration for your yard that will look good for a Halloween party.
Grave stones are definitely creepy inscribed with RIP. You can buy them, or you can cut out grey tombstones from construction paper and tape them to a wall so it looks like a silhouette of a grave yard.
Dry ice can be purchased fairly inexpensively and added to punch for a foggy atmosphere. Fog machines will do the same thing, but they’re a little more expensive.
This blog is brought to you by dialysis nursing jobs.
Cut out a shape like a bat or a skull in black construction paper. Tape it onto a flashlight and shine the light towards a noticeable wall. This will cast a shadow in the shape of your cutout that will be a unique decoration.
Scary sound effects are easy to provide, as they are available on CD at many stores. If you place them in an entry way you might be able to surprise your guests.
Switch out some of your regular light bulbs with orange, yellow, or black bulbs for a dimmer spookier look.
A coffin can be built out of a wood frame and used for a variety of purposes. You could put a dummy inside with an arm hanging out. You could put cold drinks in coolers inside. Use your imagination here.
Scarecrows are a common fall decoration for your yard that will look good for a Halloween party.
Grave stones are definitely creepy inscribed with RIP. You can buy them, or you can cut out grey tombstones from construction paper and tape them to a wall so it looks like a silhouette of a grave yard.
Dry ice can be purchased fairly inexpensively and added to punch for a foggy atmosphere. Fog machines will do the same thing, but they’re a little more expensive.
This blog is brought to you by dialysis nursing jobs.
Friday, October 17, 2008
Decorate Your Home for a Halloween Party – Part One
If you are having a Halloween party this year make sure to decorate your home to get the guests into the spirit. There are plenty of decoration ideas, choose one or all of them for your party. Most of the materials required for these ideas can be acquired from a discount or party store.
Having a few jack o’ lanterns displayed on your front porch or around the house are vital. Carving pumpkins can be a lot of fun for you and especially for kids. There are hundreds of printable stencils available on the internet for free. If you aren’t into carving you can always paint a design on your pumpkin instead.

Candles displayed inside of the jack o’ lanterns will give the faces or designs the appropriate eerie Halloween glow. You can get dark candles and scary looking candle holders to display randomly around your house too.
Crepe paper can add a little fun to your home in Halloween colors. It is cheap and easy to decorate with. Use it as a border around the table where you are planning to have your Halloween treats displayed.
Fake blood is a creepy touch that can be easily added. You can even make your own fake blood using corn syrup, food coloring, and a touch of milk to make the blood look darker and thicker. It can be very messy of course and will stain, so use with caution. Fake blood might best be used outdoors where you won’t have to worry about it getting on your carpet and furniture.
This blog is brought to you by rehab jobs.
Having a few jack o’ lanterns displayed on your front porch or around the house are vital. Carving pumpkins can be a lot of fun for you and especially for kids. There are hundreds of printable stencils available on the internet for free. If you aren’t into carving you can always paint a design on your pumpkin instead.

Candles displayed inside of the jack o’ lanterns will give the faces or designs the appropriate eerie Halloween glow. You can get dark candles and scary looking candle holders to display randomly around your house too.
Crepe paper can add a little fun to your home in Halloween colors. It is cheap and easy to decorate with. Use it as a border around the table where you are planning to have your Halloween treats displayed.
Fake blood is a creepy touch that can be easily added. You can even make your own fake blood using corn syrup, food coloring, and a touch of milk to make the blood look darker and thicker. It can be very messy of course and will stain, so use with caution. Fake blood might best be used outdoors where you won’t have to worry about it getting on your carpet and furniture.
This blog is brought to you by rehab jobs.
Thursday, October 16, 2008
Dress your Home for Fall – Part Four
Decorating your front stairs for fall can look nice. Just make sure to leave enough walking space. Use potted mums or evergreen plants surrounded by pumpkins and gourds. Rusty pots make good planters for this display, but terra cotta pots will work too. If you carve pumpkins, use your carved pumpkins here, this display will look awesome lit up with your jack o’ lantern.

If you have a bench in your front yard, don’t forget to dress it up like you did your porch.
Inside the home it is important to decorate for fall too. If you have a fireplace, take advantage of it by placing pumpkins, carved is best, one or two on each side of the fireplace. Fireplace mantles also look great decorated for wall with candles, leaves, and mini pumpkins.
There are fake pumpkins that you can buy at a craft store that will last for years. They can even be carved just like a real pumpkin.
Most of the decorating ideas in this and the past three blogs before it can be mixed and matched. Have fun with these projects and let your creative side come out. Be careful not to go overboard with your fall decorating. It can look silly to decorate every available surface in your home, and it will be quite time consuming to do so also. Make sure that wherever you stand in your home you can only see one of two fall decorations at a time.

If you have a bench in your front yard, don’t forget to dress it up like you did your porch.
Inside the home it is important to decorate for fall too. If you have a fireplace, take advantage of it by placing pumpkins, carved is best, one or two on each side of the fireplace. Fireplace mantles also look great decorated for wall with candles, leaves, and mini pumpkins.
There are fake pumpkins that you can buy at a craft store that will last for years. They can even be carved just like a real pumpkin.
Most of the decorating ideas in this and the past three blogs before it can be mixed and matched. Have fun with these projects and let your creative side come out. Be careful not to go overboard with your fall decorating. It can look silly to decorate every available surface in your home, and it will be quite time consuming to do so also. Make sure that wherever you stand in your home you can only see one of two fall decorations at a time.
This blog is brought to you by physical therapy jobs.
Subscribe to:
Posts (Atom)


